
OBIEE 11G Creating a Narrative View
You create a Narrative view to provide information such as context, explanatory text, or extended descriptions along with column values for an analysis. You can include values from attribute, hierarchical, and measure columns. If you want to include hierarchy levels in a Narrative view, use selection steps to display the levels. The Narrative view is a combination of text and query column values.
To add a Narrative view, perform the following steps:
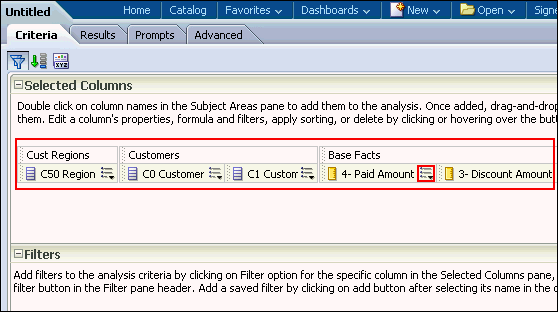
| 1 . | To create a meaningful Narrative view, begin by creating a new analysis that includes a calculated item. a. Create an analysis as you did above, including the following columns:
|
||||||||||||
|---|---|---|---|---|---|---|---|---|---|---|---|---|---|
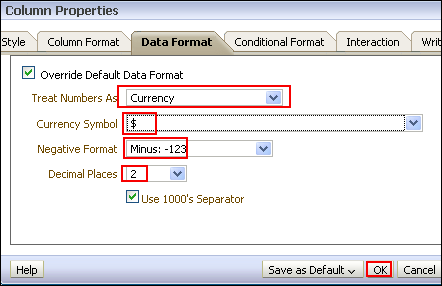
| 2 . | a. Add 3 – Discount Amount to the Criteria tabbed page a second time. The Selected Columns within the Criteria tabbed page should look like this: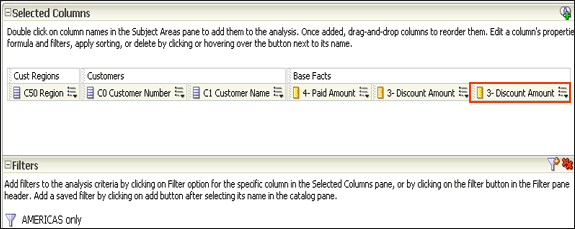 b. Edit the Column Properties for the duplicate 3 – Discount Amount column. Click More Options for this duplicate column and select Column Properties. 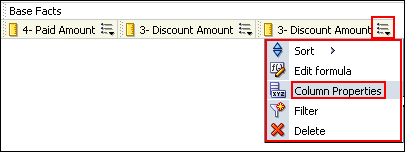 c. Select the Column Format tabbed page, and select the check box for Custom Headings. Enter Discnt Pct to Paid Amt in the Column Heading text box. 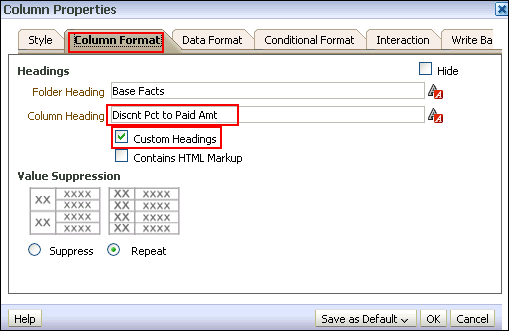 d. Using the Data Format tabbed page, format the data for this column as a percentage with two decimal places and then click OK. 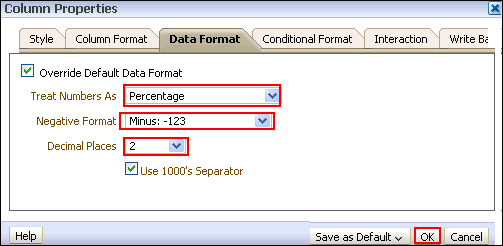 The Selected Columns should look like this: 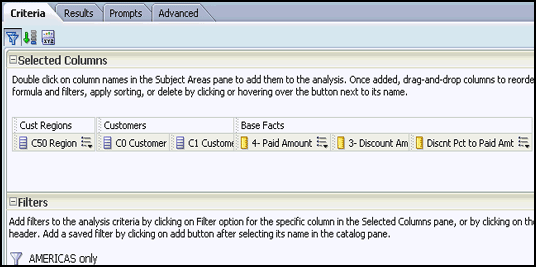 |
||||||||||||
| 3 . | a. Click More Options for Discnt Pct to Paid Amt and select Edit Formula.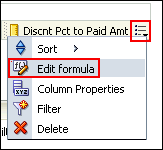 The Edit Column Formula dialog box appears: 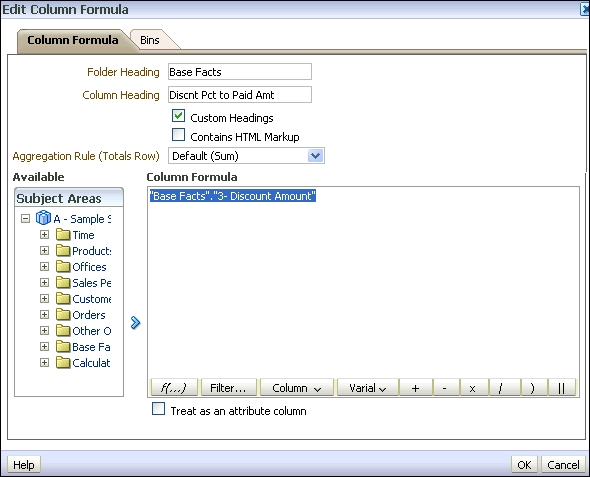 b. Enter the following formula in the Column Formula text box. (“Base Facts”.”3- Discount Amount”/”Base Facts”.”4- Paid Amount”)*100
Hint: You can copy the line of code and paste it in the Column Formula text box. |
||||||||||||
| 4 . | a. Select the Results tabbed page and remove the Title view from the Compound Layout. b. Click the Edit View icon to open the Table editor. 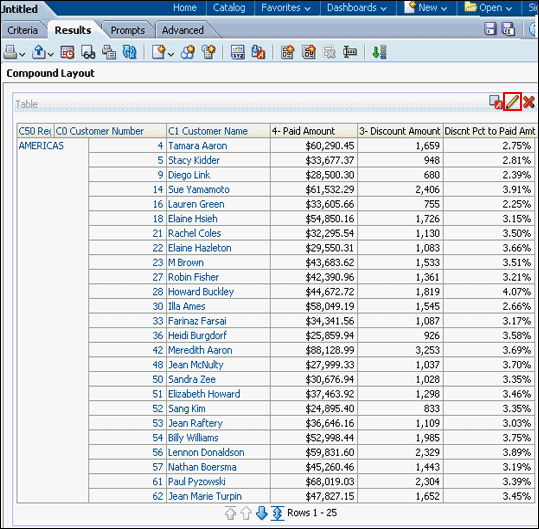 c. Click the More Options icon for C50 Region and select Hidden to hide the column. 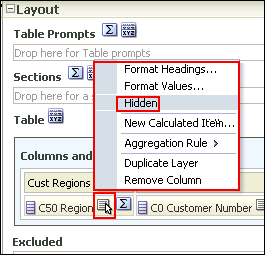 d. Click Done to review your results. The Table view should look like this: 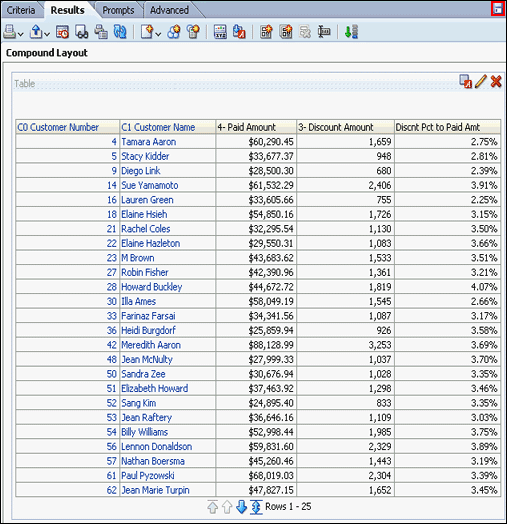 e. Save the analysis as Customer Discounts by Region. |
||||||||||||
| 5 . | To add the Narrative view perform the following steps: a. Click the New View icon on the toolbar and select Other Views > Narrative. 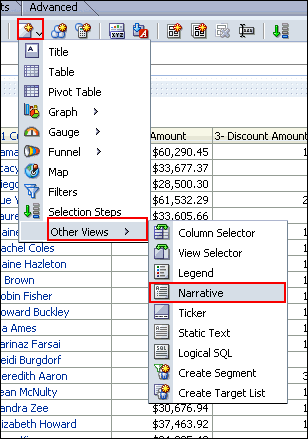 b. Drag the Narrative view above the Table view. 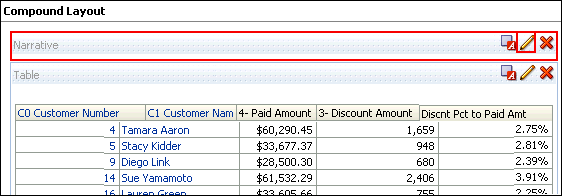 c. Click the Edit View icon for the Narrative view. |
||||||||||||
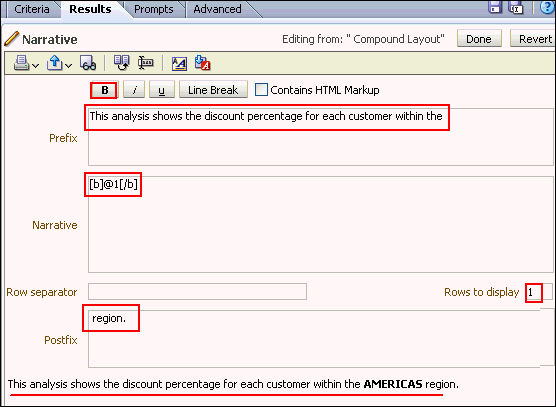
| 6 . | The Narrative editor appears.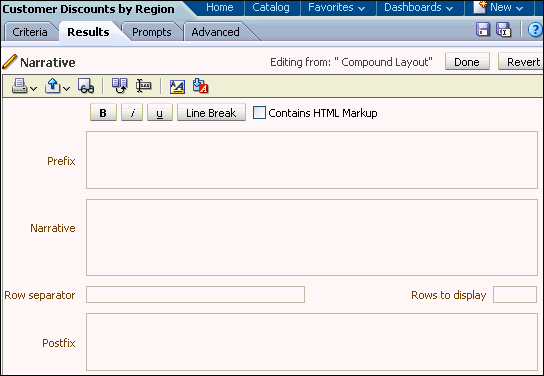
b. In the Prefix text box, enter This analysis shows the discount percentage for each customer within the , ensuring that you leave a single space following the last word. |
||||||||||||
| 7 . | Click Done and save your analysis. The Compound Layout should look like this: This concludes the topic of creating a narrative view. |

No Comments